Haybusa Parts and Service Member Support

Author Topic: Reaper0995's home turbo busa project RUNS AGAIN!!  (Read 84449 times)

Offline SPARKY1397R

  • Universal Post Whore
  • *******
  • Posts: 7596
  • Gender: Male
Re: Reaper0995's home turbo busa project
« Reply #100 on: May 09, 2007, 12:00:00 AM »
can i be your friend?  :lol:

Offline Kuhrazy

  • Rider
  • ***
  • Posts: 128
Re: Reaper0995's home turbo busa project
« Reply #101 on: May 09, 2007, 12:47:16 AM »
shhhhiiiiaaaatttt... I pay you to make me seat covers....

 :D

Offline reaper0995

  • Post Master
  • *****
  • Posts: 1710
  • Gender: Male
    • my turbo project
Re: Reaper0995's home turbo busa project
« Reply #102 on: May 19, 2007, 06:21:16 PM »
so i decided to give the whole carbon fiber thing a little test.  i got some FIBERGLASS resin and WD-40 as my contact and release agent.  the carbon fiber peices i am doing (dash inners) are NOT structural, so i dont think that having the best of the best epoxy resin will be needed, thus i got the fiberglass (like $9 at ace hardware).

the CF is VERY DELICATE!!!!  it looks like the way they weave it the fibers themselves are almost like they are layed FLAT beside one another, and when you touch them, they tend to "collect" or "roll."  almost like hair, where you may have it straight (parellel to one another), then if you begin to rub your fingers it tends to bunch up.  hard to explain, but long story short, the more i fiddled with it the larger the holes became in the part that you could kinda see-thru.


all the parts to do this:  vaccuum, garbage bag, scissors, resin/hardener, obect to test on (bottom of bottle), wd-40, foam (to allow air to escape around carbon fiber), and of course carbon fiber cloth.


cutting the carbon fiber to size


mixing hardener into resin


wd-40 onto the foam so it can be taken off after resin has cured


applying the resin to bottle


laying the carbon fiber on the resin


carefully applying the carbon fiber to the bottle


just so you are on the same page as me (putting the foam on the CF then inserting into bag)


after the vaccuuming....some air got in, but it looks like the carbon fiber was already pressed to the bottle, so should be fine....


Offline reaper0995

  • Post Master
  • *****
  • Posts: 1710
  • Gender: Male
    • my turbo project
Re: Reaper0995's home turbo busa project
« Reply #103 on: May 21, 2007, 12:19:26 PM »
well, the carbon fiber bottle worked....kinda.  the foam did NOT work well.  it did press it firmly, but it made the resin have a grainy finish and left little bits of foam behind.  the bag, however, did touch some of hte carbon fiber it appears and those parts where it touched worked well: or it touched it and then the air released it to not form bond.  in any case, it was promising enough to start on one of the pieces.


for this piece (only did one thus far), i actually did NOT use a bag at all.  the peice was just too ackward to handle and put in the bag, so i just kept applying the resin with my finger until the CF took the shape of the part.


Offline reaper0995

  • Post Master
  • *****
  • Posts: 1710
  • Gender: Male
    • my turbo project
Re: Reaper0995's home turbo busa project
« Reply #104 on: May 21, 2007, 12:34:27 PM »
and another minor update....

i have the whole kill switch lanyard thing working as well as the actual switch to deactivate it (the actual switch just connects the leads so when i drive around town i dont need to use the lanyard.  DAILY DRIVER dont forget!!)


and i was looking through and i realized i hadnt posted how i made my bar ends.  i first made the prototypes here on my lathe i have.  i orignally made these for a mini-chopper i made when i was in high school (3-4 years ago)!! made out of aluminum.


then my uncle, who has a machine shop, made a set of stainless on a fully CNC'ed machine.  here is it next to the prototype.  by the way, thanks to my uncle Jim!!  he actually made these for me as a suprize gift!!  thanks!!


and originally these were made for the mini chopper, and have standard threads.  thanfully though, they also had a large recession machined into them so welding an adaptor bolt was pretty easy.


and the final look of the cockpit :lol:


Offline Shamrock

  • Post Apocalyptic Whore
  • ********
  • Posts: 10171
  • Gender: Male
    • Shamrock Racing
Re: Reaper0995's home turbo busa project
« Reply #105 on: May 21, 2007, 02:04:23 PM »
Hint of the day  :wink:  prep part clean very well  now use 3m super 77 spray adhiseive slowly apply the carbon mesh now resin. then resin again sand smooth the clearcoat with automotive paint

Offline reaper0995

  • Post Master
  • *****
  • Posts: 1710
  • Gender: Male
    • my turbo project
Re: Reaper0995's home turbo busa project
« Reply #106 on: May 21, 2007, 07:00:56 PM »
Hint of the day  :wink:  prep part clean very well  now use 3m super 77 spray adhiseive slowly apply the carbon mesh now resin. then resin again sand smooth the clearcoat with automotive paint

haha, i may have to.  i was actually wondering about this, namely because it is very much so like the way i used to do interior work (glue the part and apply fabric).  hadn't thought it would work on these kinds of things, but i will try a test peice since i already have the glue!!


thanks

Offline Shamrock

  • Post Apocalyptic Whore
  • ********
  • Posts: 10171
  • Gender: Male
    • Shamrock Racing
Re: Reaper0995's home turbo busa project
« Reply #107 on: May 21, 2007, 07:17:20 PM »


trust me it works iv done 3 or 4 seat cowls  :wink:

Offline reaper0995

  • Post Master
  • *****
  • Posts: 1710
  • Gender: Male
    • my turbo project
Re: Reaper0995's home turbo busa project
« Reply #108 on: May 23, 2007, 10:45:27 PM »
check it out!!!!  looks like the adhesive idea is THE way to do it!!  i had thought of this a while back, seeing as it is virtually the exact same thing i did with upholstery items in cars, but i thought that the adhesive would not work with the CF.  i thought the CF would twist and distort (which it kinda does IF you move it even a LITTLE), or not mix with the resin, or, etc...  BUT, it did!!  thanks for the help 469, the wholes vaccuum idea really sucked :lol: or didnt...


ok, so here is the run down.  you need an industrial strength automotive (upholstery) adhesive, i think most stores like home depot or something carry a similar style adhesive.  PREFERABLY spray can, but i dunno if you could really do a "paint-on" style glue, but the spray stuff is cheap.  you need the resin (once again i have fiberglass resin, nothing special), a mixing can, brush (wal-mart has these for like $0.25), and of course your part and some carbon fiber.

spray on the adhesive.  do light strokes, making sure to be even and NOT to make any globs.  you dont need much, but make SURE ALL areas that are to be covered in CF have glue!!  if no glue, then the CF will "float" over it and part may not look good or even work.... then take the CF and make SURE that it is straight and ready to lay on the part, begin to slowly work it on, making sure not to let the edge of the CF come close the part, as it will fray and you dont want to run short (i did once or tiwce).  and remember, YOU HAVE ONE CHANCE TO DO IT RIGHT!!!  you MAY be able to make a SMALL correction, but for the most part when the CF touches the glue, thats where it will be forever, PERIOD.  take you time on this step.  now, mix the resin and the hardener (read for exact ratios).  then take the brush ad slowly begin to spread it over the CF.  i found that going diagonal the the weave gave the smoothest brush strokes.  make sure that all the "spaces" between the weaves are filled witht the resin.  i put on a coat just thick enough to cover the part, but thin enough that once the resin cured, you could feel the weave pattern.  i will go back later and either add another layer of resin (brush of course), or try just going straight to clear coat and polishing that to level the surface.  i believe that the best method will be to re-resin the part to level the weave, THEN clear coat it and smooth it more.  i will experiament and get back on that though...


Offline reaper0995

  • Post Master
  • *****
  • Posts: 1710
  • Gender: Male
    • my turbo project
Re: Reaper0995's home turbo busa project
« Reply #109 on: May 24, 2007, 05:46:33 PM »
just thought i may go ahead and add this in here so that i would have my FULL build diary in one place.... (copied from another thread i started)


this install took me just over an hour (timed) from fairings off to back on again.  i have never done this mod before, but had taken apart the clutch before (http://www.suzukihayabusa.org/forum/index.php?topic=70006.0)....

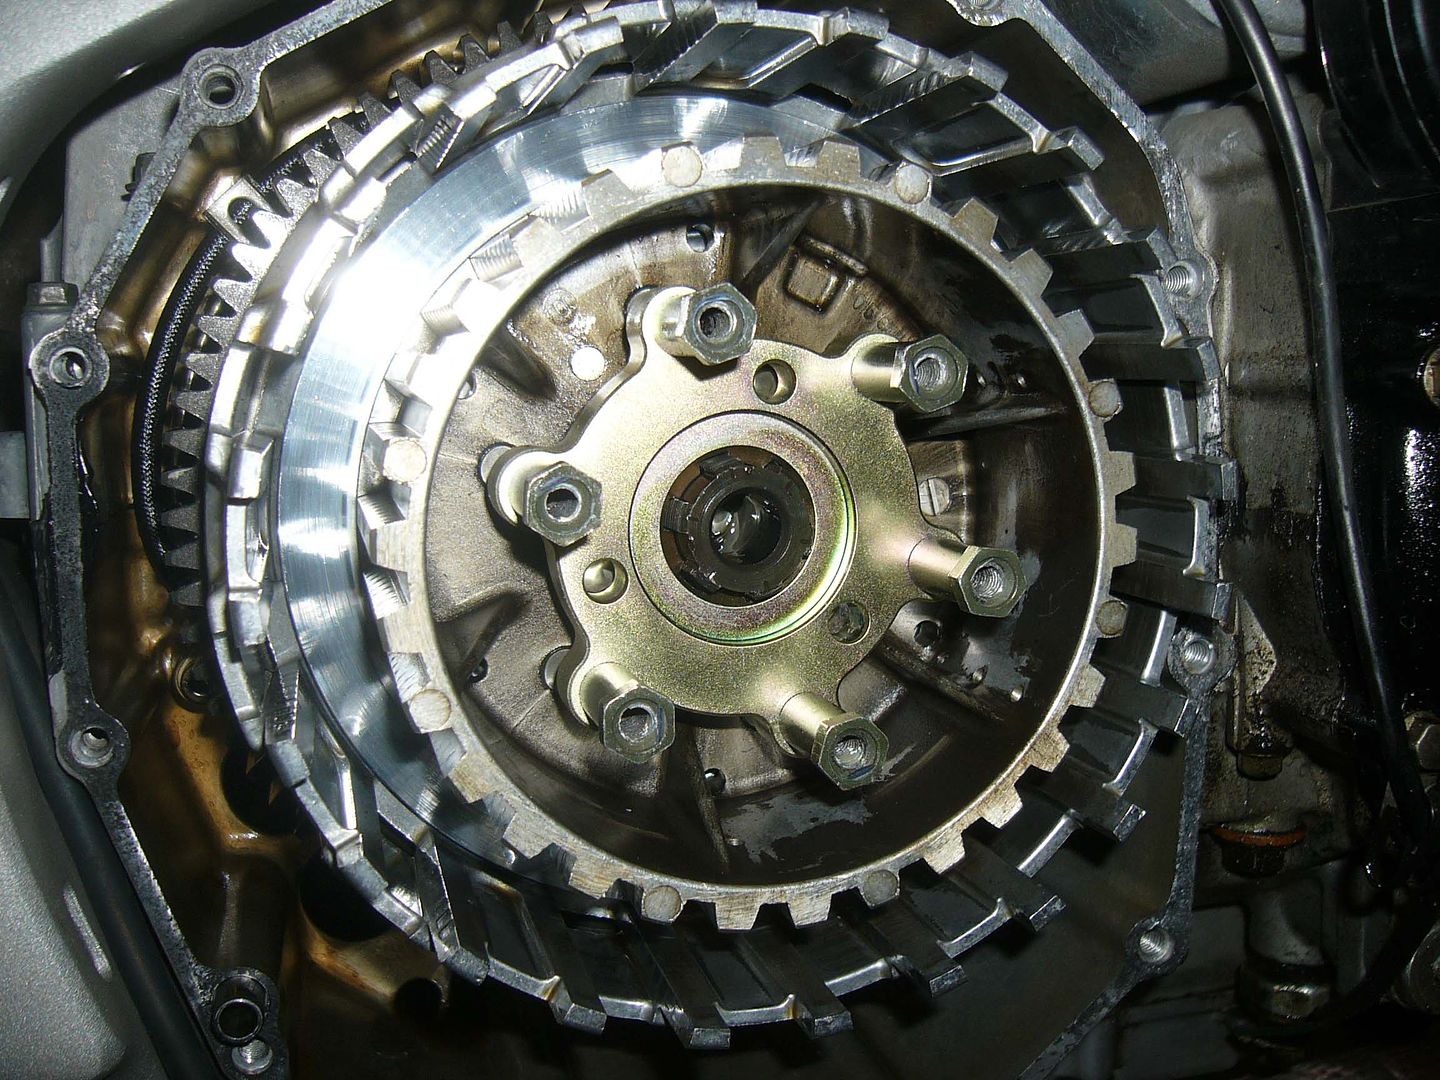
i took off the fairings, and removed the clutch cover.  i left it on the kickstand, and this was enough tilt that there was no oil in the clutch basket area.  i have also done the kickstand ground out mod...anyways, took off the out pressure plate and removed the clutch plates, leaving them in order and same direction, so as to not mix them up, not sure if important, but no use in in, right?  took of center bolt that holds the inner hub.  talk about a pain in the neck!  when removing the bearings, they all really stayed together pretty well, so i just made sure to be gentle with them so that i wouldn't have to mess with them and add more work  :D
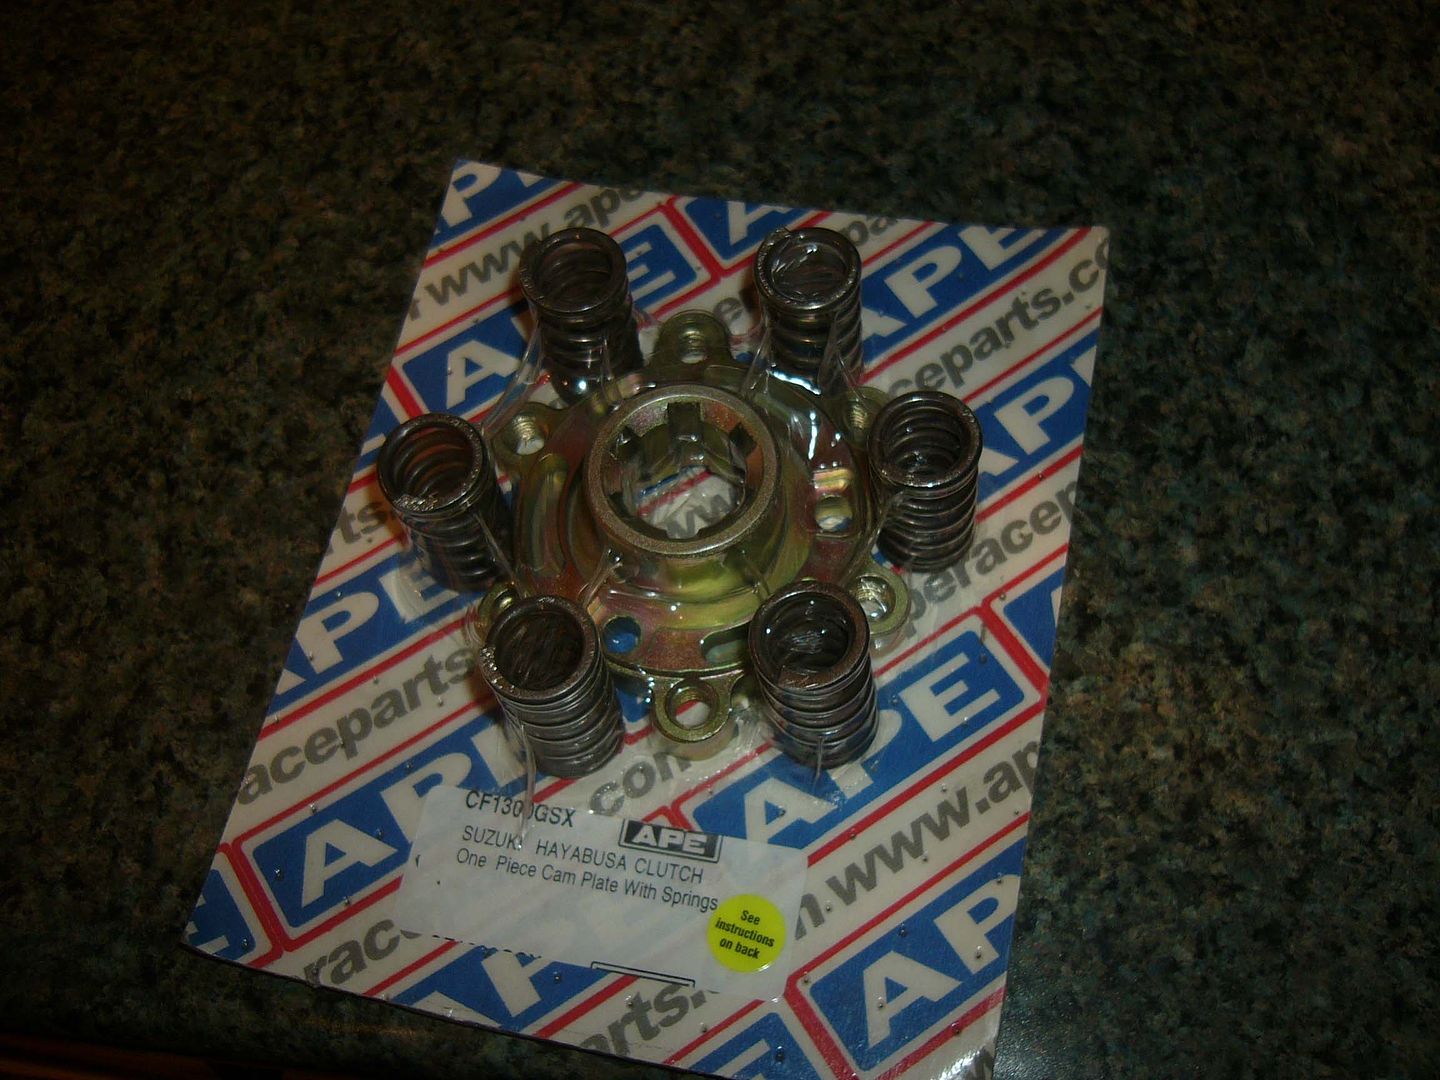
.  so then i took off bolts from stock clutch cam thingy, then retorqued them with locktite onto the one piece replacement.  it said use red, but all i had was blue, so i just put on a little extra  :wink:
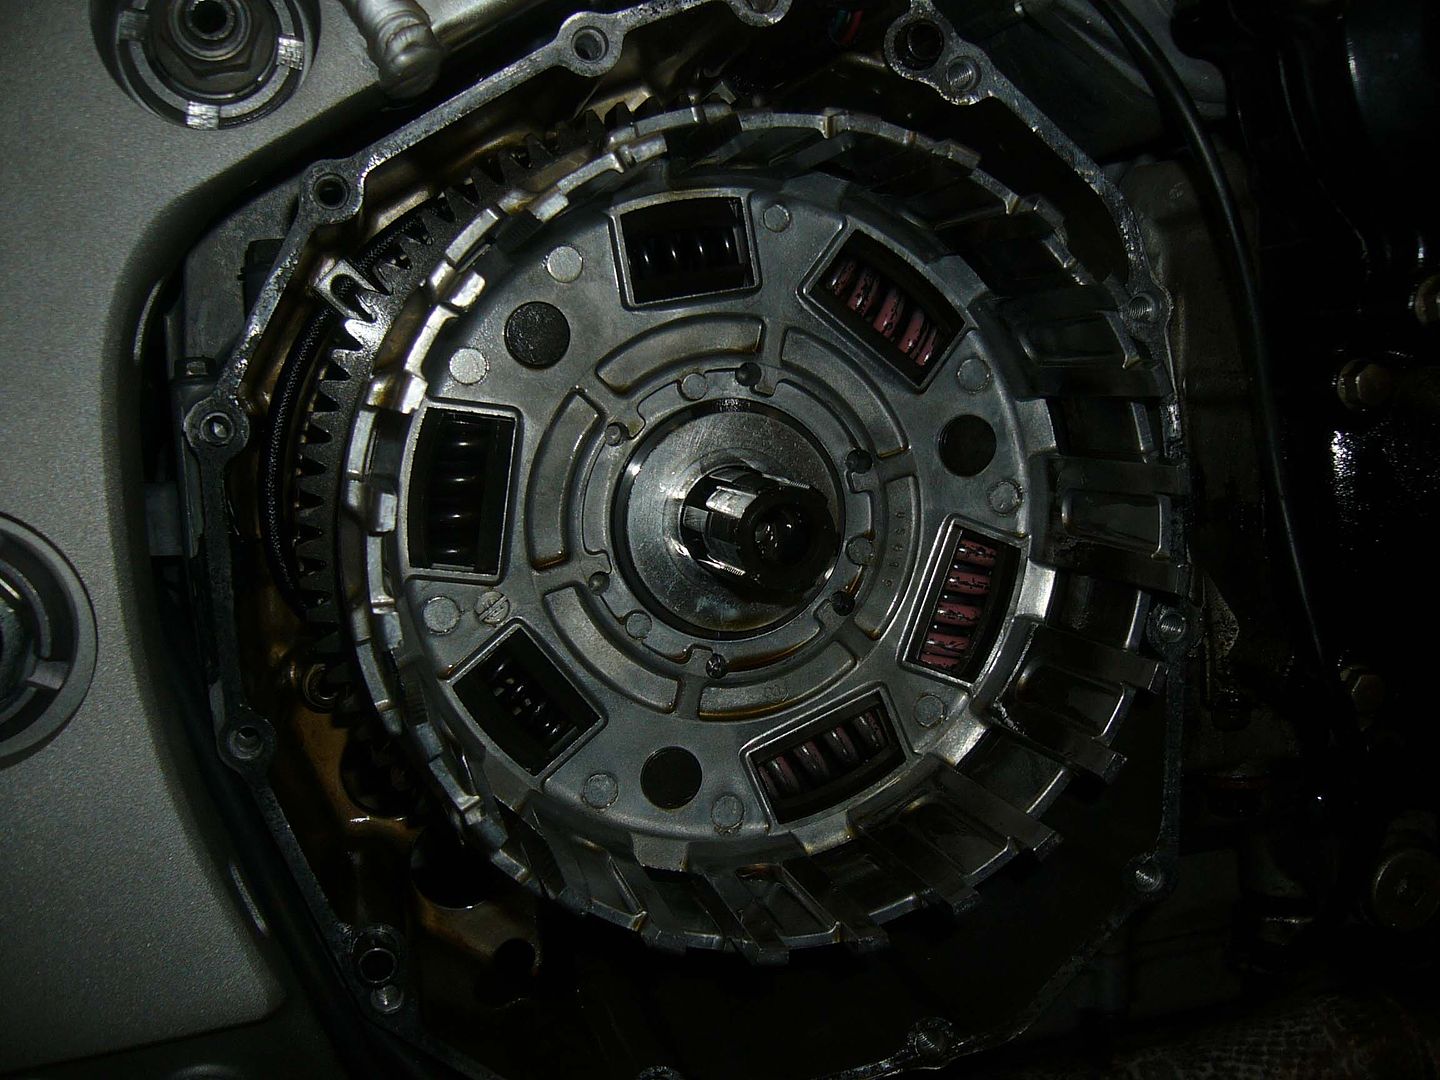
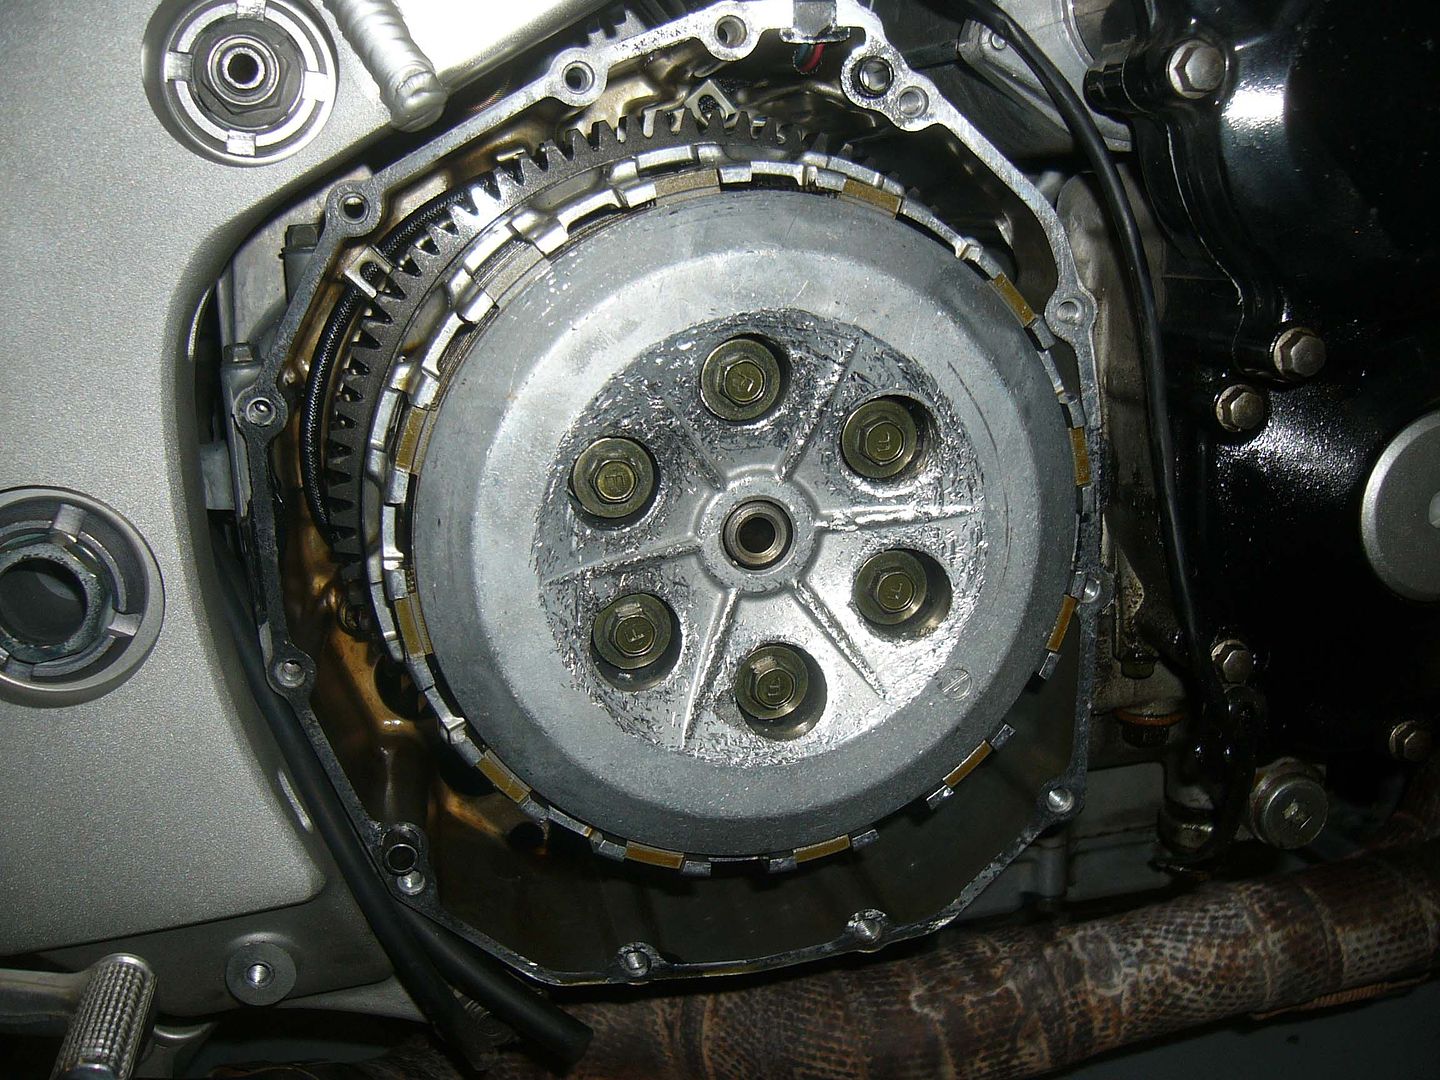
.  then i began to reassemble.  everthing was going good, until i had to torque down the inner hub retaining bolt. it is at like 68.5 ft/lbs or something rediculous, at least when the bolt threads you are tightening to are not fixed... SO, what to do??? well, i got a large plybar that i got and put it in between two or the clutch spring bolts that i had put on earlier and then tried to torque down.  this worked!!!! but i am not sure that i would like to do this one again...the manual shows a special tool that grips the 'teeth' of the inner hub, and naturally, who has one of those just laying around at home?  so the plybar to the rescue!  anywho, that was back on, did the center punch to ensure it wouldn't loosen (like manaul says to) and the put back my clutchpack.  then put back on the pressure plate and install heavy duty clutch springs.  ***FYI, the guy i bought this stuff from told me that when you use these for a while, your clutch slave support will begin to crack, and to get a clutch slave support bracket***  now, since i am probably going to put the stock springs back in after i take it to the track, i dicided not to do this, nor did i have the part...so, then it was together again, and i took it for a ride...WOW, it kinda removed that KA-THUNK that a bike makes when you downshift the bike into first from neutral.  the clutch lever is a lot stiffer, a little too stiff for long riding in my opinion (or at least in the city, highway is probably fine since no shifting).  now there was one thing the guy also warned me about and i have felt a little.  if you downshift a little abruptly, it will fishtail in the tinniest of ways.  but if you watch it and know that it has this tendency, or even if you don't, it probably won't cause much in the way of problems...unless you downshit hard in a corner, but who would do that anyway?  so here are my pics:

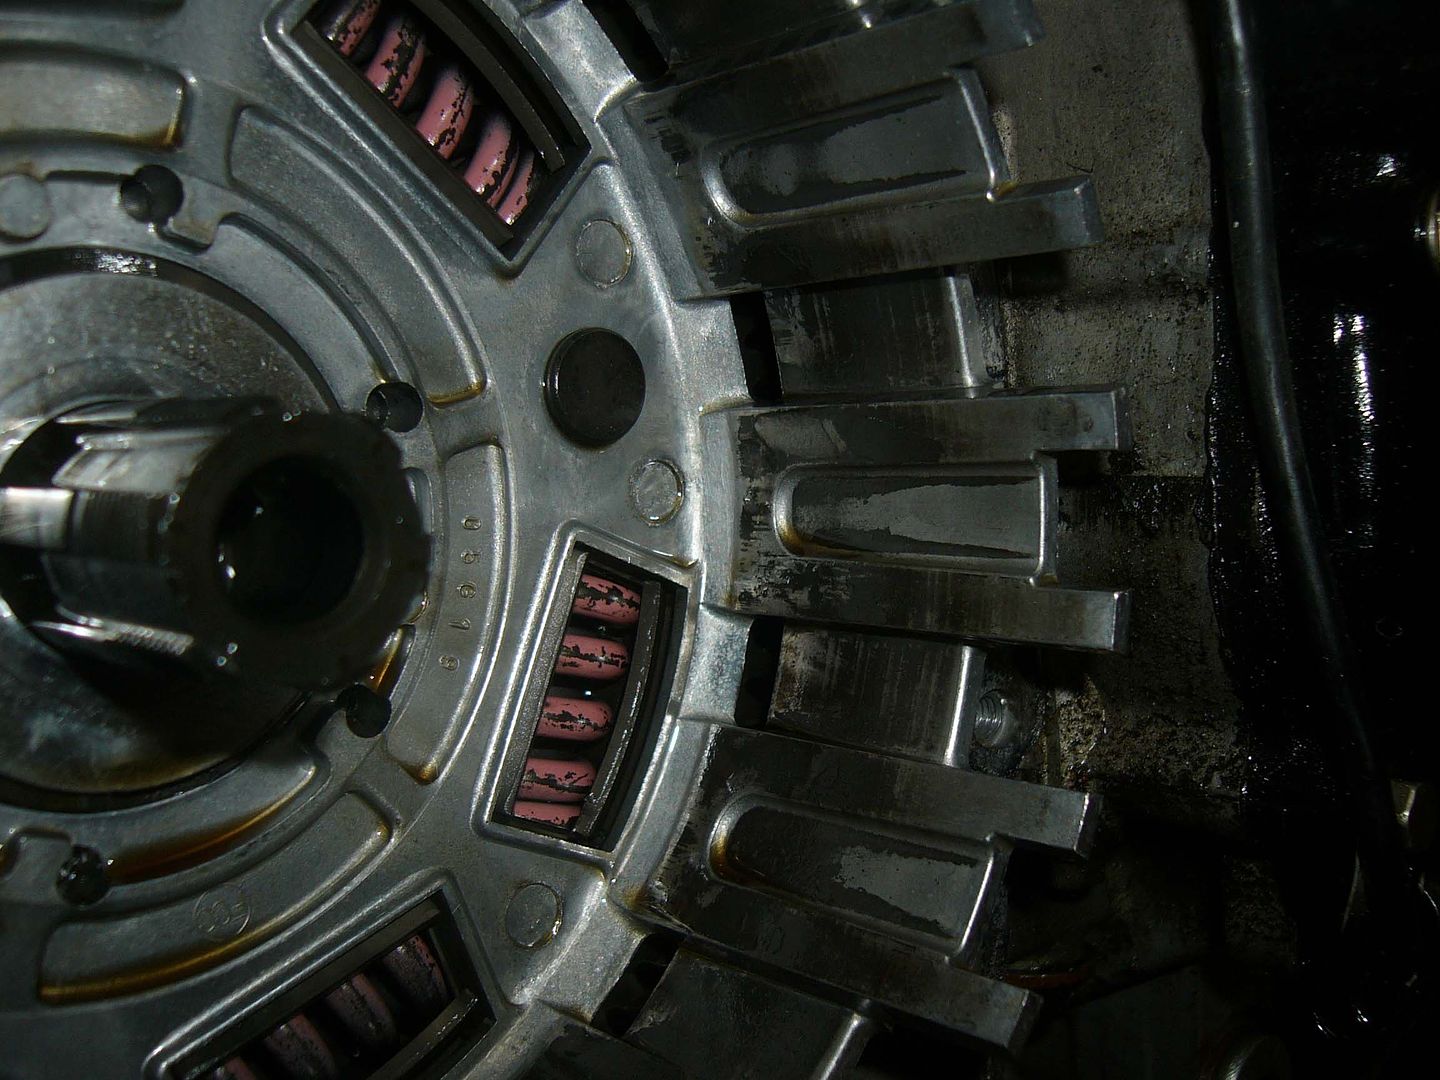
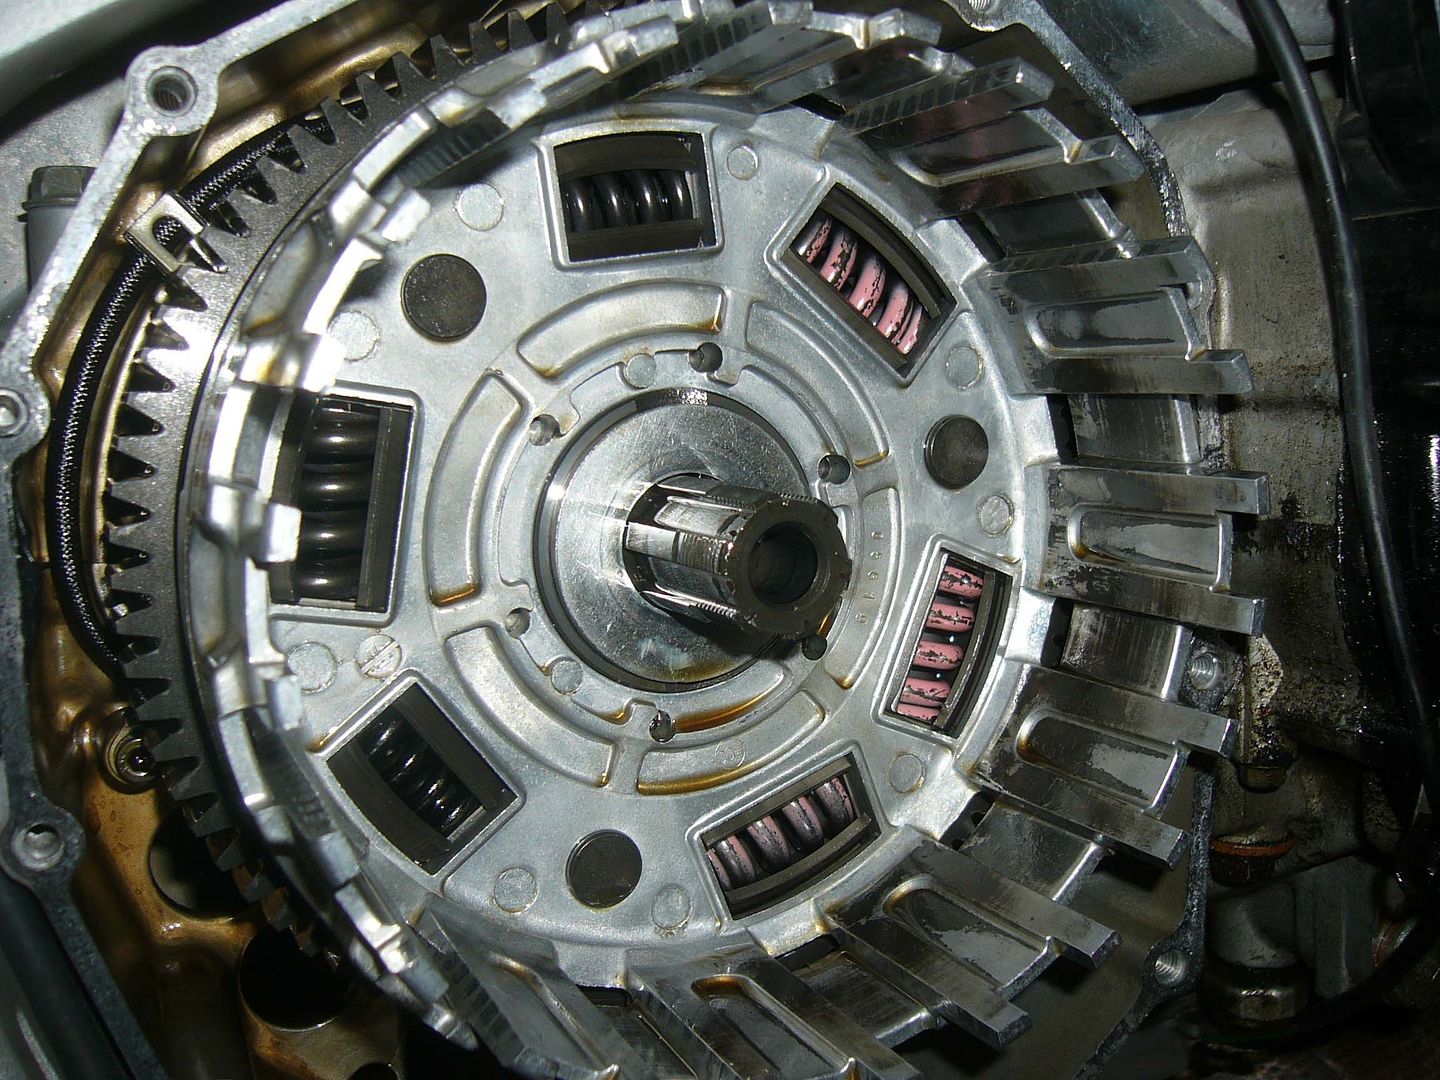
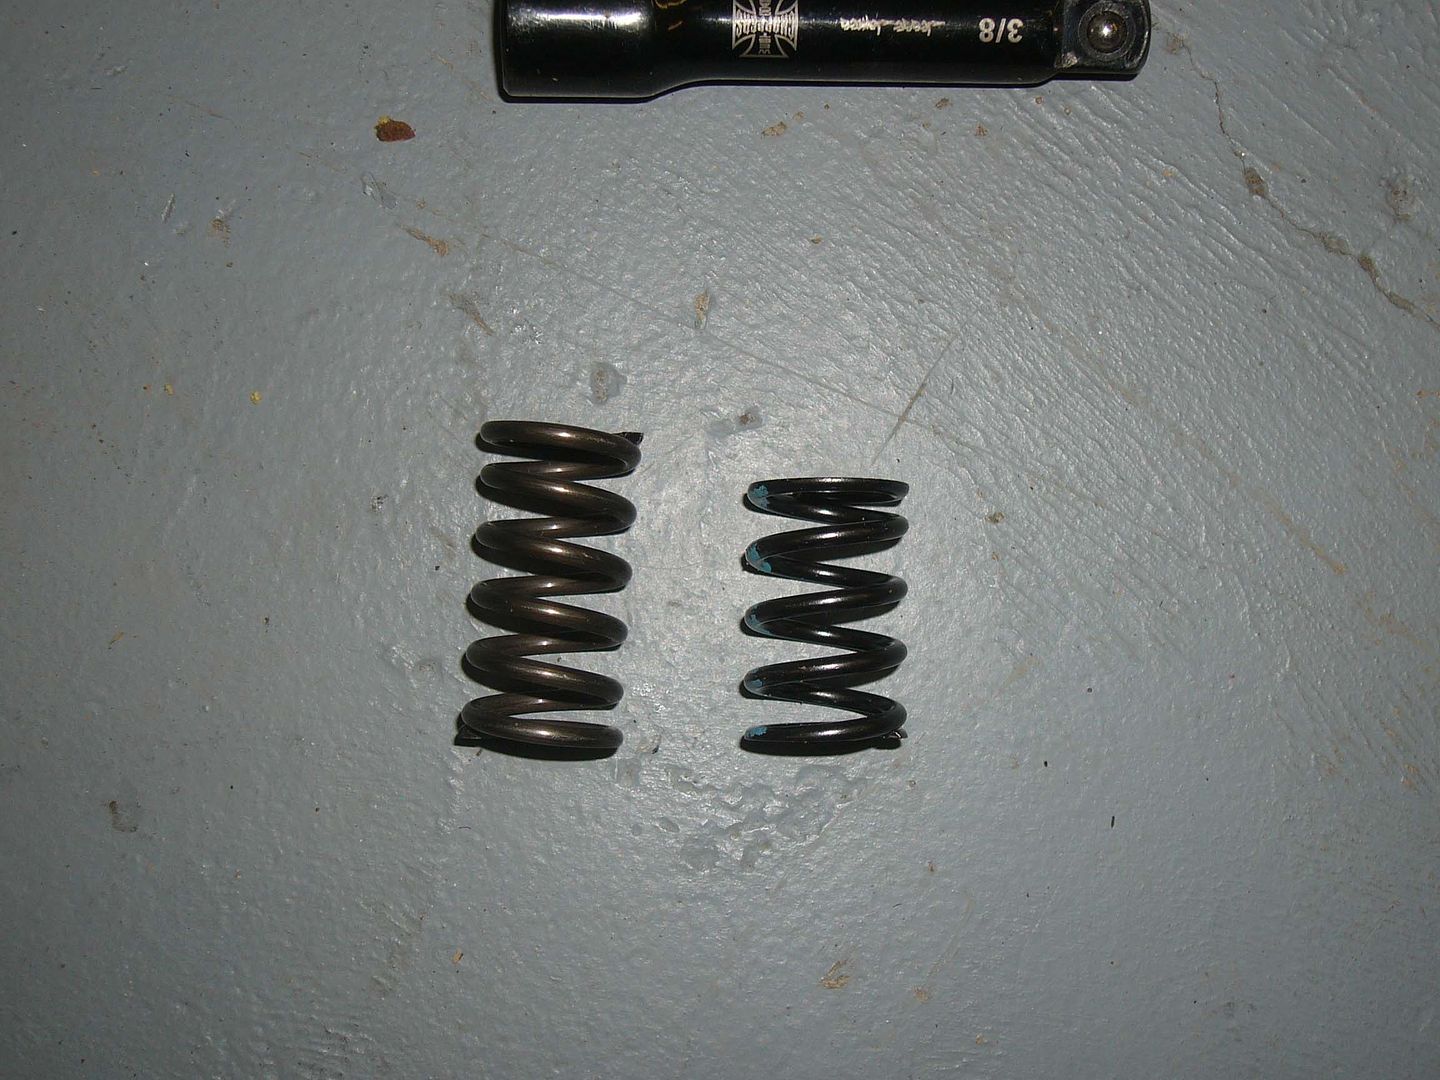
btw, the one of the two springs is stock vs. heavy duty (you can guess which is which  :D)


Offline reaper0995

  • Post Master
  • *****
  • Posts: 1710
  • Gender: Male
    • my turbo project
Re: Reaper0995's home turbo busa project
« Reply #110 on: June 13, 2007, 01:14:33 PM »
thank you busafied!!! (from the boostafied project)  i got my scavenge pump in yesterday, and took the fairings off in order to get a look at what the whole thig is gonna look like when it is done....

well, i have a few areas that i like and dont like....  it looks like it may be able to go beside the oil pan, kinda where the exhaust normally goes, but i dunno if it will be too big and hit the fairings.  i dont think it will work very good in the back, just above the underbelly wing, because it looks like it will interfere witht he wing being installed (just got one finally!!).  another probably the BEST place is going to directly under the turbo.  there, it has room left to right, up down, front back, you get it.  then my oil lines can be short, i can probabaly make a reserve tank really easily, and i can return the oil easy too..  i have 2 locations namely about returning the oil.  the first is the oil cap, but i dont want to lose the ability to add oil easily in case i am in the boonie middle of nowhere, so i DONT want to have to use this option....  my BEST option i think will be to put it next to the starter cover... dunno how to describe it, but that cover that the pimp pump goes on, right there is another hole, and when taken off you can see oil and that looks like a good place to drop it off at!!  so, that is also towards the front of the bike, and wont be visible when the fairings are on, and doesnt hinder my ability to change oil easily on the go.  looks like a winner!!  look at the pics, i have one fitting in the location i mean, plus i have a mockup of how i WOULD do the oil cap IF i were to do it that way.


Offline Busafied™

  • Mad Post Whore
  • ******
  • Posts: 2799
  • Gender: Male
    • My Homepage and BS..
Re: Reaper0995's home turbo busa project
« Reply #111 on: June 13, 2007, 06:00:52 PM »
With the pump mounted using the tab stickign down in front of the ears the center stand mounts to, it was fine-
I spaced my wing down using a few washers on each side, and making some extending tabs to lower the bracket the wing bolts to.
I do not have picks of the bracket I made to extend the bracket down, but isn't hard using some metal.

  no-one noticed it..


Don't forget man if you DO NOT use the Vent off the "T" like it was setup you risk sucking the turbo bearings dry!

See the T below the motor, the line w/o a fitting came up and over the motor on the left side.

I marked the line fitings as I had them installed in these pics & the pump worked fine.

If you HAVE ANY questions hit me up in PM's-

The Return went back here temporarily, you could return it to the pan or same place, just route it cleaner.


"You're Only Limited, By Your Own Mind..." My Home Page 
I built the Motor and the Turbo System. RIP {CDK} 11-11-08 I miss you...

Offline reaper0995

  • Post Master
  • *****
  • Posts: 1710
  • Gender: Male
    • my turbo project
Re: Reaper0995's home turbo busa project
« Reply #112 on: June 24, 2007, 11:27:36 PM »
ok, so fabbed up a bracket and put the pump on, and tilted it at an angle.  the angle helps it clear around the underbelly and will allow for an easier fitment of the right fairing as well.  i will still need to use some washers on the wing, but only like a 1/4in or so, so not bad!!  the rest of the photos are showing the feed lines to the pump, and all is left on the feed side now is to undo the RCC return line and hook up its AN fitting onto the one i have.... look at how PERFECT they line up, and TOTALLY by coincidence too!!!  the pump had to be mounted where it was, and the lines were made to length already, and it all worked at JUST right!  but yeah, gonna drain oil and do that as soon as i get the return line figured out.

the return location i had pointed out is a 16mm x 1.5mm thread.  it is a flat bushing type seal (has copper "gasket" at end of bolt, crush seal kinda thing).  since i cannot make it clear the fairings using conventional methods (AN adaptors, i tried the AN fitting in the hole and THEN a 90deg on that, but hit fairing WAY too much).  so my only real option IF i keep this as my return is i will have to make a custom banjo bolt.... other alternatives being sought out now....


Offline reaper0995

  • Post Master
  • *****
  • Posts: 1710
  • Gender: Male
    • my turbo project
Re: Reaper0995's home turbo busa project
« Reply #113 on: June 24, 2007, 11:31:42 PM »
good/bad news!!  i have foud that i have a boost leak....  the up-pipe has a rather large leak in it, a hole developed while touched the header after things had shifted and settled in on the bike.  the hole was obviously a burn type hole, large enought o put a finger through.  a piece broke off, but it broke off when i poked my finger though it, NOT while it was on the bike!!  good news is i found a boost leak, bad news is now i need to fix it!! :lol:

my finger is pointing to the part of the header the hose was touching.  my best guess thus far to really fix the problem is to make a new J-pipe from the turbo the has a bend in it, then use a coupler from there.  that will ensure the best spacing from what i can tell thus far.


Offline reaper0995

  • Post Master
  • *****
  • Posts: 1710
  • Gender: Male
    • my turbo project
Re: Reaper0995's home turbo busa project
« Reply #114 on: June 26, 2007, 10:56:51 PM »
time to fix the boost leak!!  so i got a sleeve to fit inside the coupler, i trimmed out the excess, and then hose clamped both ends of the pipe to ensure no boost got by.  isnt the ideal fix for longevity, but i want to race tomorrow!!  so it will be fine for a day or two....


and i dont have a photo of the sleeve (i cut it down to by the way) inside the tube, but you get the idea.

Offline reaper0995

  • Post Master
  • *****
  • Posts: 1710
  • Gender: Male
    • my turbo project
Re: Reaper0995's home turbo busa project
« Reply #115 on: June 26, 2007, 11:01:02 PM »
and teh scavenge pump setup is done and runs!!!  yehaw!  so yeah, onto business...  the 90deg fitting that goes to the RETURN of the motor was a bit tricky to find....  i had to take a 90deg part that was a 3/8 inner diameter fitting then take a die and re-thread it to 16mm x 1.5mm.  then just put on a bit of tefon tape, and thread in.  BUT you have to take off the starter gear cover thing to put it in!!!  if you look at the return hole i put it too, the bard on the fitting will hit the cover when tightening it on, so you have to take it off.  anf yeah, when you do, dont forget the tilt the cover BACK because a gear is actually INSIDE of the cover!  and i tiny washer spacer, dont loose these!!


Offline reaper0995

  • Post Master
  • *****
  • Posts: 1710
  • Gender: Male
    • my turbo project
Re: Reaper0995's home turbo busa project
« Reply #116 on: June 26, 2007, 11:04:30 PM »
and, one more thing to looi forward to!!  the swingarm!!  right now i am doing the no-box mod, then i will underbrace it and do 0-6 over (ideally).  this is the beginning of the no-box mod, will post tomorrow on the cut all the way around the box, following the line i have drawn.


Offline reaper0995

  • Post Master
  • *****
  • Posts: 1710
  • Gender: Male
    • my turbo project
Re: Reaper0995's home turbo busa project
« Reply #117 on: September 10, 2007, 10:24:27 PM »
SO, new update!!  bad news though... from what it looks like, the tensioner failed, and i bent some valves...  i was riding home from a friends house one night, and i heard a light ting-ing noise come from my motor.  it sounded MUCH like another pump, like a fuel pump, scavenge pump, etc, yet different enough from the ones i have to notice the new noise.  i was at like 0% throttle, so i pulled in the clutch to see what the rpms would do, the drop to 0 and made a clank clank noise in the motor.  oh no....

i tried to start it once or twice, but again it sounded like a blender of bolts :evil:  so i pulled over immediately, and luckily a friend (roommate) was following.  he went back to another friends house and got a truck and 3 of us got it loaded in the back (tough!!).  got it home and it sat for a week until..... (look at following posts)

Offline reaper0995

  • Post Master
  • *****
  • Posts: 1710
  • Gender: Male
    • my turbo project
Re: Reaper0995's home turbo busa project
« Reply #118 on: September 10, 2007, 10:34:23 PM »


if you look closely at the last photo, you can see the exhaust valves are open as well.... the cam lobes are down for them, so that is supposed to be lke that.  i am more saying this to highlight how bad the intake are...


Offline reaper0995

  • Post Master
  • *****
  • Posts: 1710
  • Gender: Male
    • my turbo project
Re: Reaper0995's home turbo busa project
« Reply #119 on: September 10, 2007, 10:38:00 PM »
valve cover off


and here is kinda the run down of the take apart.....

there are EIGHT bolts that hold the motor in.  you have to take to kickstand off to reach one.  radiator has to go, exhaust, intake, TB's, etc.  unplug some connectors, most ALL are in the belly area (where pump is and breather).  you can look around and see prtty much all of it pretty easily.  here are one side of where the bolts are.  opposite obviously on the other.'


Offline reaper0995

  • Post Master
  • *****
  • Posts: 1710
  • Gender: Male
    • my turbo project
Re: Reaper0995's home turbo busa project
« Reply #120 on: September 10, 2007, 10:38:56 PM »


Offline reaper0995

  • Post Master
  • *****
  • Posts: 1710
  • Gender: Male
    • my turbo project
Re: Reaper0995's home turbo busa project
« Reply #121 on: September 10, 2007, 10:40:56 PM »
dunno quite why that one set of retainers has the oil on it..... that is also the ONLY really damaged valves too.  i think it is coincidence, but none the less i thought it may be worth mentioning... (from previous post last photo)


and the valves:


Offline reaper0995

  • Post Master
  • *****
  • Posts: 1710
  • Gender: Male
    • my turbo project
Re: Reaper0995's home turbo busa project
« Reply #122 on: September 10, 2007, 10:44:17 PM »
overall the head damage is rather minimal.... well, thus far.  there is a lot of corrosion on the exhaust valves :? not sure why either.  maybe it got really hot a few times, but it doesnt really look like detonation.  hmm, guess it may be worth trying to replace all the valves then.  pistons look in good shape, and NO scarring on the cylinder walls!! :thumb:  good news too.  thankfully the valves didnt break or anything, so there was no serious damages to bring the motor down terribly.


Offline reaper0995

  • Post Master
  • *****
  • Posts: 1710
  • Gender: Male
    • my turbo project
Re: Reaper0995's home turbo busa project ENGINE CARNAGE!! kinda...
« Reply #123 on: September 10, 2007, 10:49:24 PM »
ah yes, and one more thing...  when i first took the valve cover off, i turned the crank with a wrech.  it tighetened, then would skip over the teeth on the intake side (bent valve side).  so my guess is that the motor skipped a tooth, started a ting-ing noise (heard it for 5 sec), then skipped another and whammo!

Offline Busafied™

  • Mad Post Whore
  • ******
  • Posts: 2799
  • Gender: Male
    • My Homepage and BS..
Re: Reaper0995's home turbo busa project ENGINE CARNAGE!! kinda...
« Reply #124 on: September 11, 2007, 06:37:34 PM »
damn man atleast you know where you are now at this point, well  for the most part.

GL,
Ron
"You're Only Limited, By Your Own Mind..." My Home Page 
I built the Motor and the Turbo System. RIP {CDK} 11-11-08 I miss you...