Ciao!
Just came back from 'Eurotrip' with my girlfriend. Driving around the Europe 4030 km through 8 countries incl. Czech, Slovakia, Hungary, Croatia, Slovenia, Italy, Switzerland and Germany for 2 and half weeks. If you have so much money you can't spend all to your busa I reccon travelling to you too

Over two thousand euros less money in the pocket bike building will be freezed for a time so it's good time writing here..
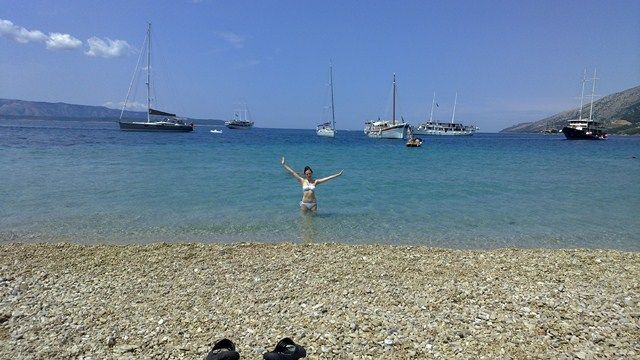
Bikinis at Bol, Croatia
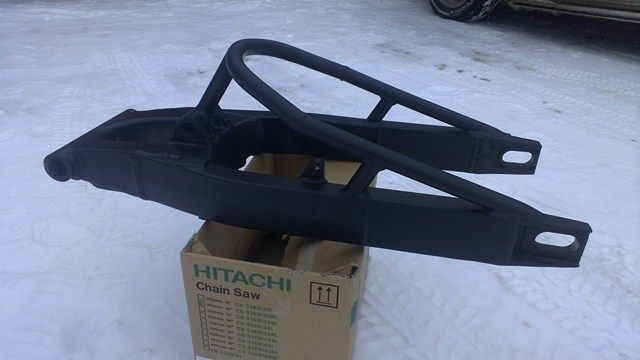
Continuing with the swingarm: So I chose to buy already 7" streched swingarm from the states. It was advertised as a bolt-on and the price wasn't that bad so I though it would be a good deal..

Problems with the swing began immediatelly when I took it from the package. Paint quality sucked and just putting it in a carbon board box had damaged the paint all over. The whole part including bearings were covered with blasting sand. I decided to get it painted again and was lazy so I said the paint firm worker to cover all bearing so they could be used again. Wrong again. Nothing wrong with paint this time but nothing was done to save the bearing so there was thick layer of paint in all needle bearing which was cooked in an oven when paint was dried. Fcuk. To the bearing store. Purchasing new ones took over a month because of long delivery times and the fact I had to order parts three times because of my stupidity. I always thought I have hurry and didn't concentrate... THERE MUST ALWAYS BE TIME TO DO THINGS CORRECTLY AT THE FIRST TIME!
Finally I got the arm in and to my eyes it looks good in lenght!
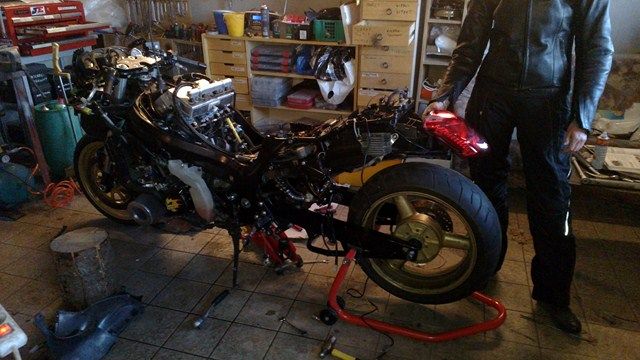
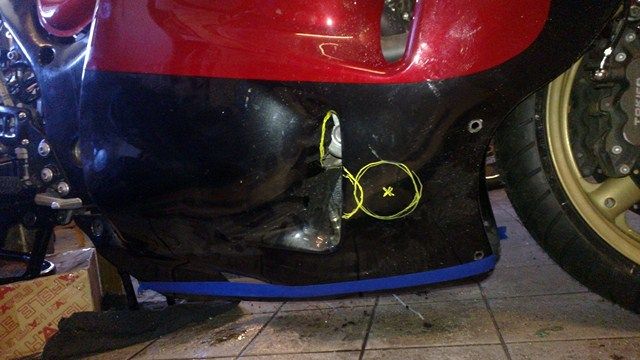
Before painting last minute mods were done including making more ground clearance to the fairings which were scraping ground in last season.
I also made outlet for the 'power exhaust'...

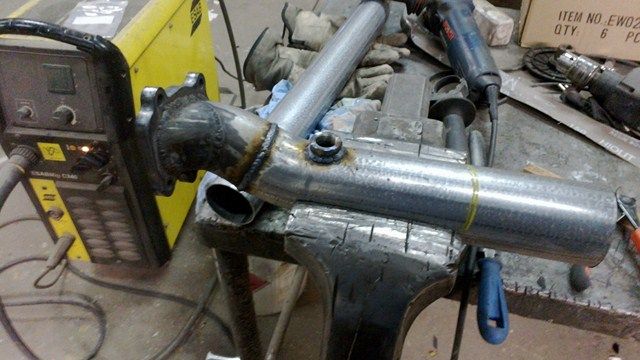
...which was done by cutting the existing pipe and welding there a straight 2,5" pipe instead
Again I cut cornerns and painted the exhaust by basic matt black hot-proof spray

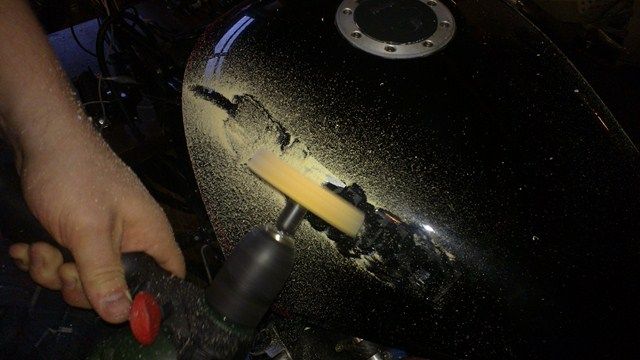
Painting began by rubbing off the stickers which can be made the easiest by a rubber wheel attached to a drill. This is a very fast method and you must be careful not to dig a hole in there which you later then must put cement in...
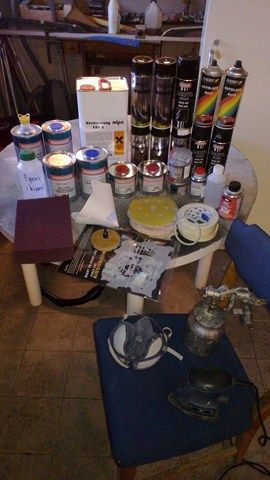
Here you can find almost everything which was used when doing the painting. Price tag without tools and mask around 200-250
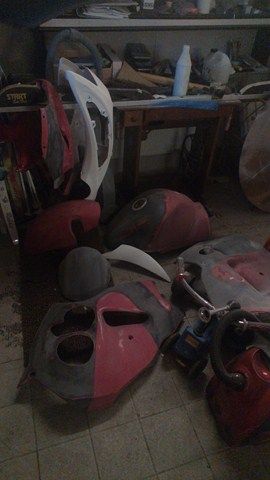
Here are the fairings sanded and finished with 400-grade paper
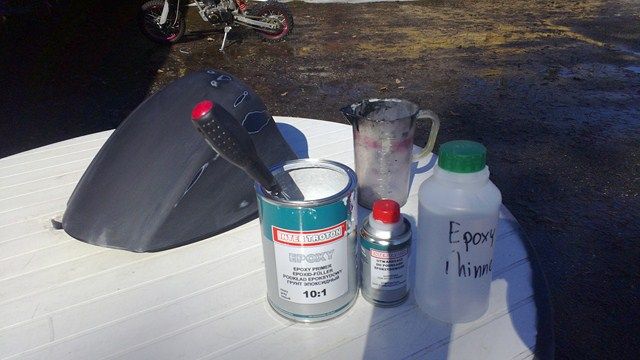
Ducktail - because of it's unnecessarity - was always the first part to be painted. Here's epoxy primer before mixing...
...and after spraying. This is around 0,5 - 1 mm thick layer which is then sanded (until 400-grade sandpaper in my case) before spraying anything with color.
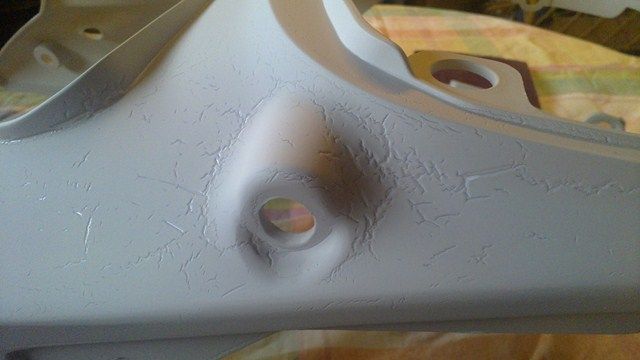
On any other part there were no problems but with the chinese tail fairing (and all parts related) some grooves were formed. This was one pain in the ass because of the thick layer this wouldn't have been easy to remove so I decided to cement all grooves.
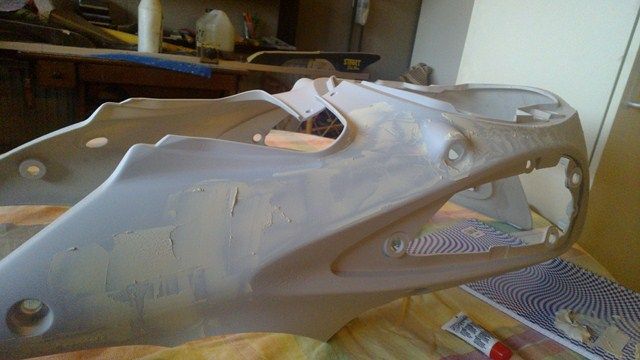
The really funny thing here was that the grooves were everywhere and because of the tail fairing complex shape both adding cement and sanding were really frustrating. I'm not still sure what caused this trouble but it must be related to the chinese fairing material somehow because this problem was ONLY with it.
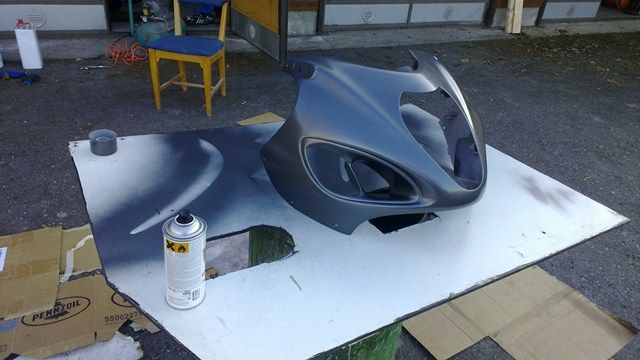
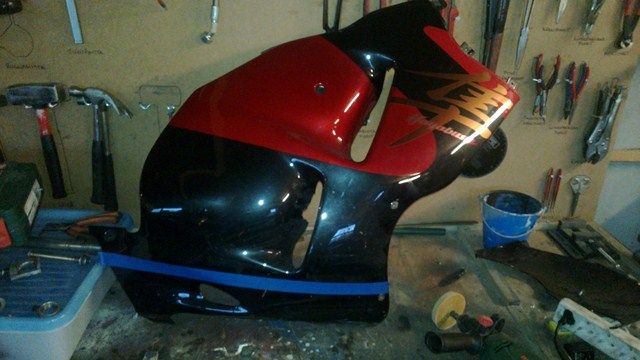
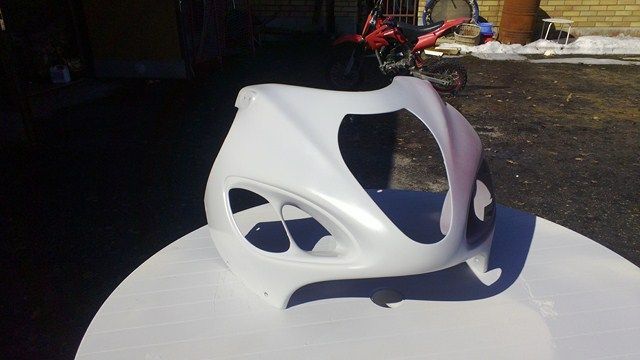
After sanding I sprayed the base color which is Titanium (-spray)

When there are multiple layer of paint and lots of work then one wants to make the job easier somehow... Sometimes I used spray instead of the paint gun because it's just much easier and when using 2K-clear coat on the top the paint job quality will still be high (assuming that compatible high quality products are being used..)
This is all today - I leave you guessing what will be the color of the bike when the base paint color is Titanium?